
How To Photograph Your Car Like A Pro
Joe Moore
It is as predictable as death and taxes. When we are at a car show there will be at least one person who comes up and asks that one question ,"How can I get my car into a magazine?" Which we usually smiled and said "we don't carry feature cars", but with the addition of a feature car in the future that is going to have to change. The truth is ,and this going to hurt ,we know, but most of you will never see your car in a magazine. Simply because your car does not fit a quality check list for publication, or that your car may never be seen by an editor. Your car must fit check list that a magazine uses, whether that list is written, or just part of the journalist make up. While we can't help if your doesn't fit the guidelines, we can help you get editors, including our own to see your car.
One of the best ways to get an editor to see your car is to send a photo, but unfortunately most photos that arrive here are so bleached out , or shot so that badly that we can't make out any details. So the boss suggested that we give you some tips on photographing your car. By knowing the basics of taking photos of your car you can improve the chances of seeing your car in a magazine, and with our Web-e-zine, it will actually be your photos that will appear here. Also knowing how to take photographs, can yield you a quality print that you can proudly show off.
List of Equipment You will Need:
35-mm SLR Camera
Multi use zoom lens (35-80-mm)
Adjustable head Electronic flash unit
Flim-400-ASA (Color)
POSSIBLE EXTRA EQUIPMENT
Polarizing Filter
Tripod
Extra lens
_______________________
Requirements For Publication
5x7 Color Print
3/4 Shot
Full Side shot
Engine shot
Interior Shot
(These are our recommended shots but we will consider other views according to subject matter)
Fill our Specification Sheet (Click Here)
Mail To: Feature Editor
SJLE Publications
Showme Cars Magazine
711 Hillcrest
Monett, Missouri 65708 USA
For Electric submissions please send an e-mail and request electric submission guidelines. E-mail us now
|
First off that point and shoot job that you have used to record JR's first steps has no place in automotive photography. The fixed lens, is usually a wide angle, which allows more detail in the photo but in doing so can distance the main subject. The best choice yet is the 35-mm single-lens-reflex (SLR) camera. Professionals usually use a high dollar Nikon unit, but a good quality 35-mm camera like the Cannon Rebel will work. The SLR camera has the advantage of being able to switch lens. By be able to switch from a telephoto lens you can get close ups without having to move. And when photographing a race a telephoto lens is the only way to get those amazing head on close ups. The Cannon Rebel comes with a 35-80 mm zoom lens and features automatic focusing, which is what I would recommend for amateur photographers. The standard lens should give you a good selection in photographing your car.
Another piece of indispensable equipment is a good quality electronic flash unit. You may be thinking while do I need a flash unit if I'm going to be taking photos outside? A flash unit is the only way to get great engine in interior shots. You may be taken back by the number of flash units there are available. There are many different types some that require a battery pack while others require titanium battery and other require to standard alkaline batteries. For the amateur I would recommend a flash unit that uses the standard alkaline batteries, the titanium units use a lot of power and the batteries are fairly expensive, that the battery pack units, which run on a separate battery pack, are for professional use only . What ever they type, get one that has an adjustable flash head, so that you can vary the flash angle, as a full on flash can destroy an otherwise good shot.
While you're at the camera shop you may be offered filters that can correct a number of thing from color to creating fog. Truth is we use very few filters, and the only filter that we occasionally use is the polarizing filter, which can reduce glare on glass. The rest of the filters are nice, but are not really needed. The only other item you might need is a good sturdy tripod, especially if you are using a telephoto lens or have trouble holding the camera still.
Now with the introduction of the digital camera you may think this would be the hot thing to have. This trend as yet to sweep over automotive arena. We still prefer, call us old fashioned if you must, that old 35-mm camera. Unless the digital camera is a high dollar unit with a high pixel rating the quality can not compare to the 35-mm, there is an exception and that is on line magazines which can and most do accept digital prints. See side bar for a list of our requirements.
|
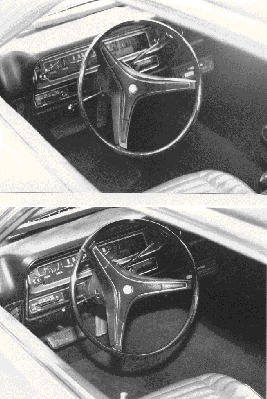
The difference a flash makes. The above shot was taken without a flash
and hides details in the shadows. The below shot is taken with a flash.
Also the photo shows problems that can occur in direct sunlight notice the flare off the drip rail.
If you are going to use a digital camera, then this section will be of no use to you as the one big benefit to digital photography is that it does not require film. For others you may wonder why in the world of color that black and white photos are still used. For the print world it is cost, it costs less to print in black and white then color. Second certain photos taken on a different look when shot in black and white; for example a white car on a black back ground takes on a different look than the same shot in color.
However, most amateur photography will be done in color. Color film is easy to find, and process and color photography can be converted to black and white but black and white, can not easily be converted to color for this reason we suggest you stick with color.
If your going for poster size, I would recommend a 200 ASA or even a 100 ASA, but to get a great shot it will require that the camera be mounted on a tripod. The slower the film, the less likely you will be able to hold the camera by hand, also the more light you will need. However, the faster the speed the less light is required and the more easier it is to hold the camera by hand. But the faster films result in a more grainy looking print. A general speed of 400 ASA works well, this film is fast enough to use in various light conditions yet provide a fine enough grain for standard enlargements. The 400 ASA is what we use most of the time.
Rule 1: Position: Keep your back to the sun. It seems over used, but you would be surprised at how many times this is not used. When you shoot directly into the sun, it blinds the camera and cause the automatic exposure to over compensate with an ultra high shutter speed resulting in a bleached out print. Always face the car into the sun, this way the areas like grilles and hood scoops do not hide in the shadows. Of all the problems this one is the number one mistake amateurs do. The exception to this rule is close up work which if the sun is behind you can cause shadows to fall on the car. So before you snap the photo, make sure your shadow will not appear in the photo.
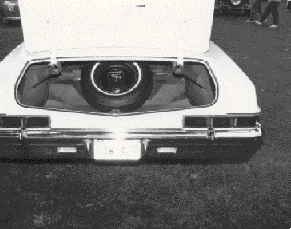
There are several thing wrong with this photo
One the deck lid should be down, it is too distracting.
Be sure you check the that you don't cut part of the car off
in the photo. And never shoot on rainy day.
Rule 1: Time of Day: With the right know -how and equipment, cars can be photographed anytime of the day. But for less trouble. Cars should be photographed in the early or late hours of the day. After 11:00 a.m. to about 2:00 p.m., the sun is too high in the sky, and creates a bleached-out appearance killing a cars details. When the sun is lower in the sky and you face the car into the sun , then the hidden details, like inset grilles, are revealed. The exception to this rule is when photographing convertible interiors, here when the top is down a high sun is good for lighting the interior. If shooting a convertible interior later in the day, back the car into the sun. This way the sun will sweep down into the areas like under the dash.
Wait till the sun is real low in the sky to photograph interior shot of coupes, and use a flash to light hidden details. Or bounce light into that area with a piece of white cardboard Don't wave off an overcast day for taking photos, in fact a day with a bright sun that is hidden behind a veil of thin clouds is a photographers dream. The bright sun offers light and the clouds hide the shadows.
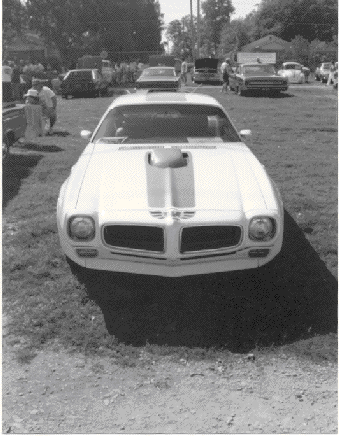
This Trans Am shot is not interesting. Background is cluttered and angle makes car appear small. A more interesting shot could have been had if photographer had kneeled down.
Rule 3: Angle: The trouble with most amateur photos, is that they shoot the car standing up. This results in an unflattering angle on the car and does not look natural. Instead squat down and get on the same level as the car; this results in a more pleasing look. The stand up position is the most distracting on a straight ahead shot. Three-quarter shots, where the front or rear and sides of the car are showing, are the best. But if you shoot straight on, you must get on the same level of the car. There are those cases where getting higher, like standing on a ladder and shooting down on the car are used, but this is best left to the pros.
Rule 4: Background/Site Selection: Should cars ever be shot on the grass? After all cars belong on the road. That all depends on the particular tastes, I have seen both and prefer ,as the web-e-zine does (though we have done both), cars that are not on the grass. It just looks more natural.
Site selection is another item that amateurs overdo. They seem to associated a beautiful back ground such as the state park or scenic view as the ideal location. But glamorous back grounds can distract from the car, the brain can only soak up so much detail and if you place your hot rod in front of a glamorous sense then the eyes will most likely lock on the back ground and not the car. The same goes for having your wife or girlfriend pose with the car. This pose even more of a problem for magazines, as we need a model release to use such a photo and most magazine don't want to see her they want to see your car.
When selecting a site, it does not have to be anything grand, it can be anything from an empty parking lot, to your own driveway. When evaluating a potential site, frame it off through a window that is formed by two fingers and your thumbs. Hey! If Hollywood can do it you can too and it helps in forming an image of your photo. When selecting a site, look for distracting features such as telephone poles and trees, a simple brick wall can make an excellent back drop.
Once you have selected your site place the car there and then again looking for distractions. Background objects like telephone poles can appear to be growing out of the top of the car. While marks on the pavement in the foreground can draw your eyes away from the car.
Another factor to watch is the color of the background and foreground. A light colored car works the best when shot with a dark background. While shooting a black car on black pavement will result in a muddy-looking photograph that is hard to distinguish where the car and pavement begin and end. A black car is better if it is shot on a white chat parking lot or drive. Also use some logic in selecting your background, and choose a background that might compliment your car's theme. For example; if you have a pace car replica a natural look would be to photograph in front of the grandstand of your local race track.
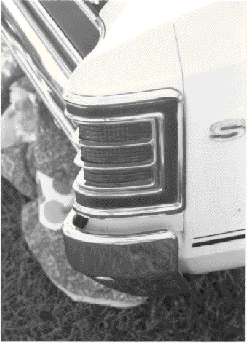
Watch the back ground. The blanket under
the car draws the eye away from the tail lamp.
Rule 5: Composition: The car should always be the center of attention of the photo. Photographing your car at the top of scenic hill and trying to get in all the background will reduce your car to nonexistence becoming a small speck in the large world. Instead tighten the frame down and center the car just slightly below the centerline of the photo , which will give the image of being the center as this is the way the brain sees cars.
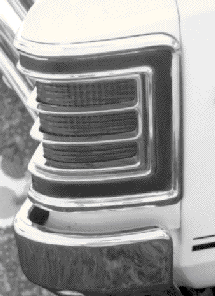
An example of how cropping can save the shot.
The blanket under the car is not as noticeable in the crop photo.
Is shown to the right.
Do not use 1-hour processing. It may be a great invention for applications. But regardless of what anyone will tell you the color process of quick processing lacks the color depth of standard processing. It is usually cheaper to send them out also, but make sure that they use standard process and it not just a big firm using the 1-hour process on a big scale. If you have to wait a week or more it is usually the standard process. Black and white photos will require standard processing, as the 1-hour process will give them an antique effect, which is not desirable for publication.
  Tired of Playing Spy? Tired of Playing Spy?The codes have been broken
No longer are the codes of the Mopar Broadcast Sheet and the Chevrolet Protect-O-Plate a mystery. Undercover the secrets your car is hiding. Order the Mopar Broadcast Sheet Decoder Guide 1969-74
or the GM Protect-O-Plate 1965-1972 Chevrolet book today.
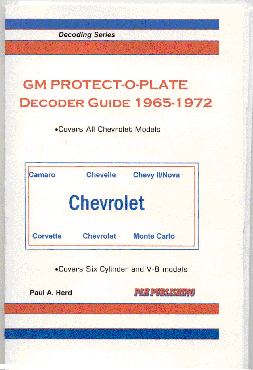 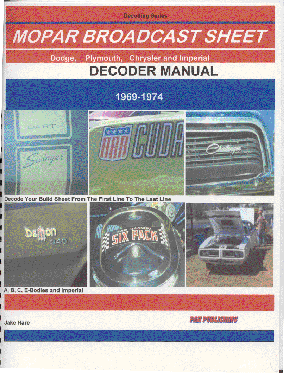 Decode Your Protect-O-Plate code by code with this handy little DECODE IT YOURSELF AND SAVE
guide. Covers all Chevrolet models, except truck . Order it today Decode your 1969-1974 Mopar Build sheet with this guide
for only $9.99. Cat. No. PBCH100733 Available only by mail covers all Dodge, Chrysler, Plymouth and Imperial car models
order or call us and add it to your credit card. From a six cylinder Duster to Hemi Chargers.
Order today $19.97 Cat No. SPMP100732
Call in your order at 417-236-0077
Add only $4.95 S&H For one book or 100 books!
PAH Publishing
Trade Desk
711 Hillcrest
Monett, Missouri 65708 USA
VISIT US ON THE WEB:
Checks are welcome!
COMING SOON: 1967-69 Camaro Mini Restoration Manual
1964-72 Pontiac Salvage Yard Buyers Guide
(C) 2002 PAH Publishing
|
Go to: